Line Profile Create by iMaster NCE-FAN NMS
Today I will give example how to Create Line Profile by iMaster NCE-FAN NMS.
Its just example, you need to configure profile by use your VLAN & which port you want to configure which VLAN.
You need to create a DBA profile before creating a Line profile. You can check below post:
How to create a DBA Profile by NCE-FAN NMS
Follow below step by step process:
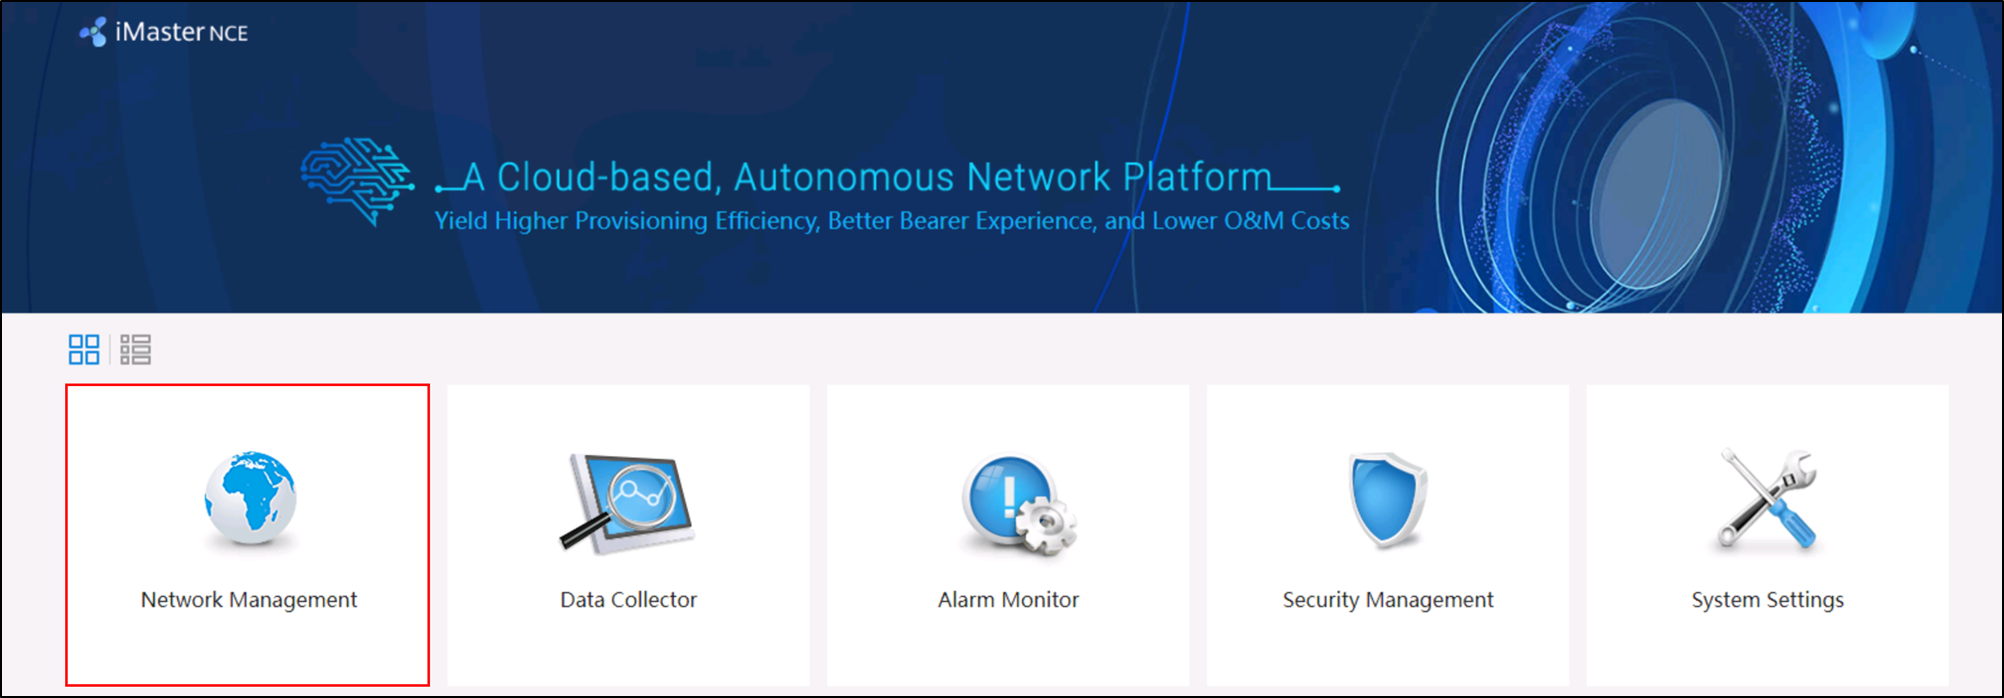
1. Log in your iMaster NCE-FAN NMS and choose Network Management.
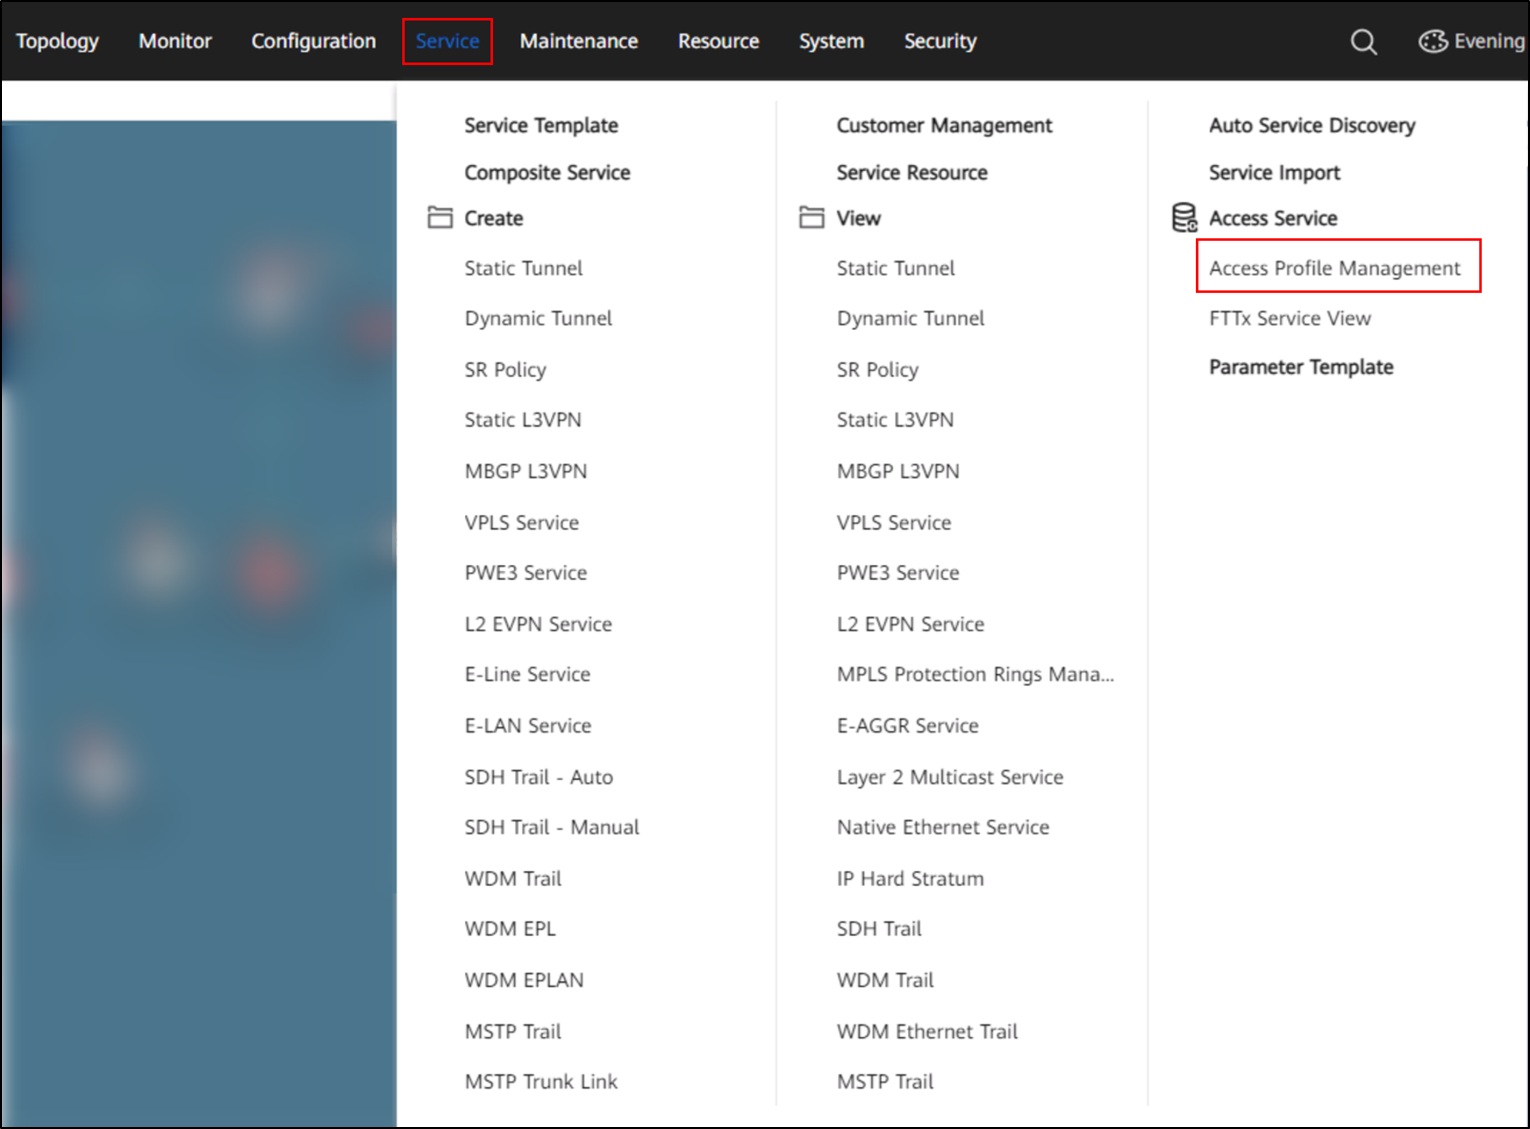
2. Select a Service and click the Access Profile Management tab.
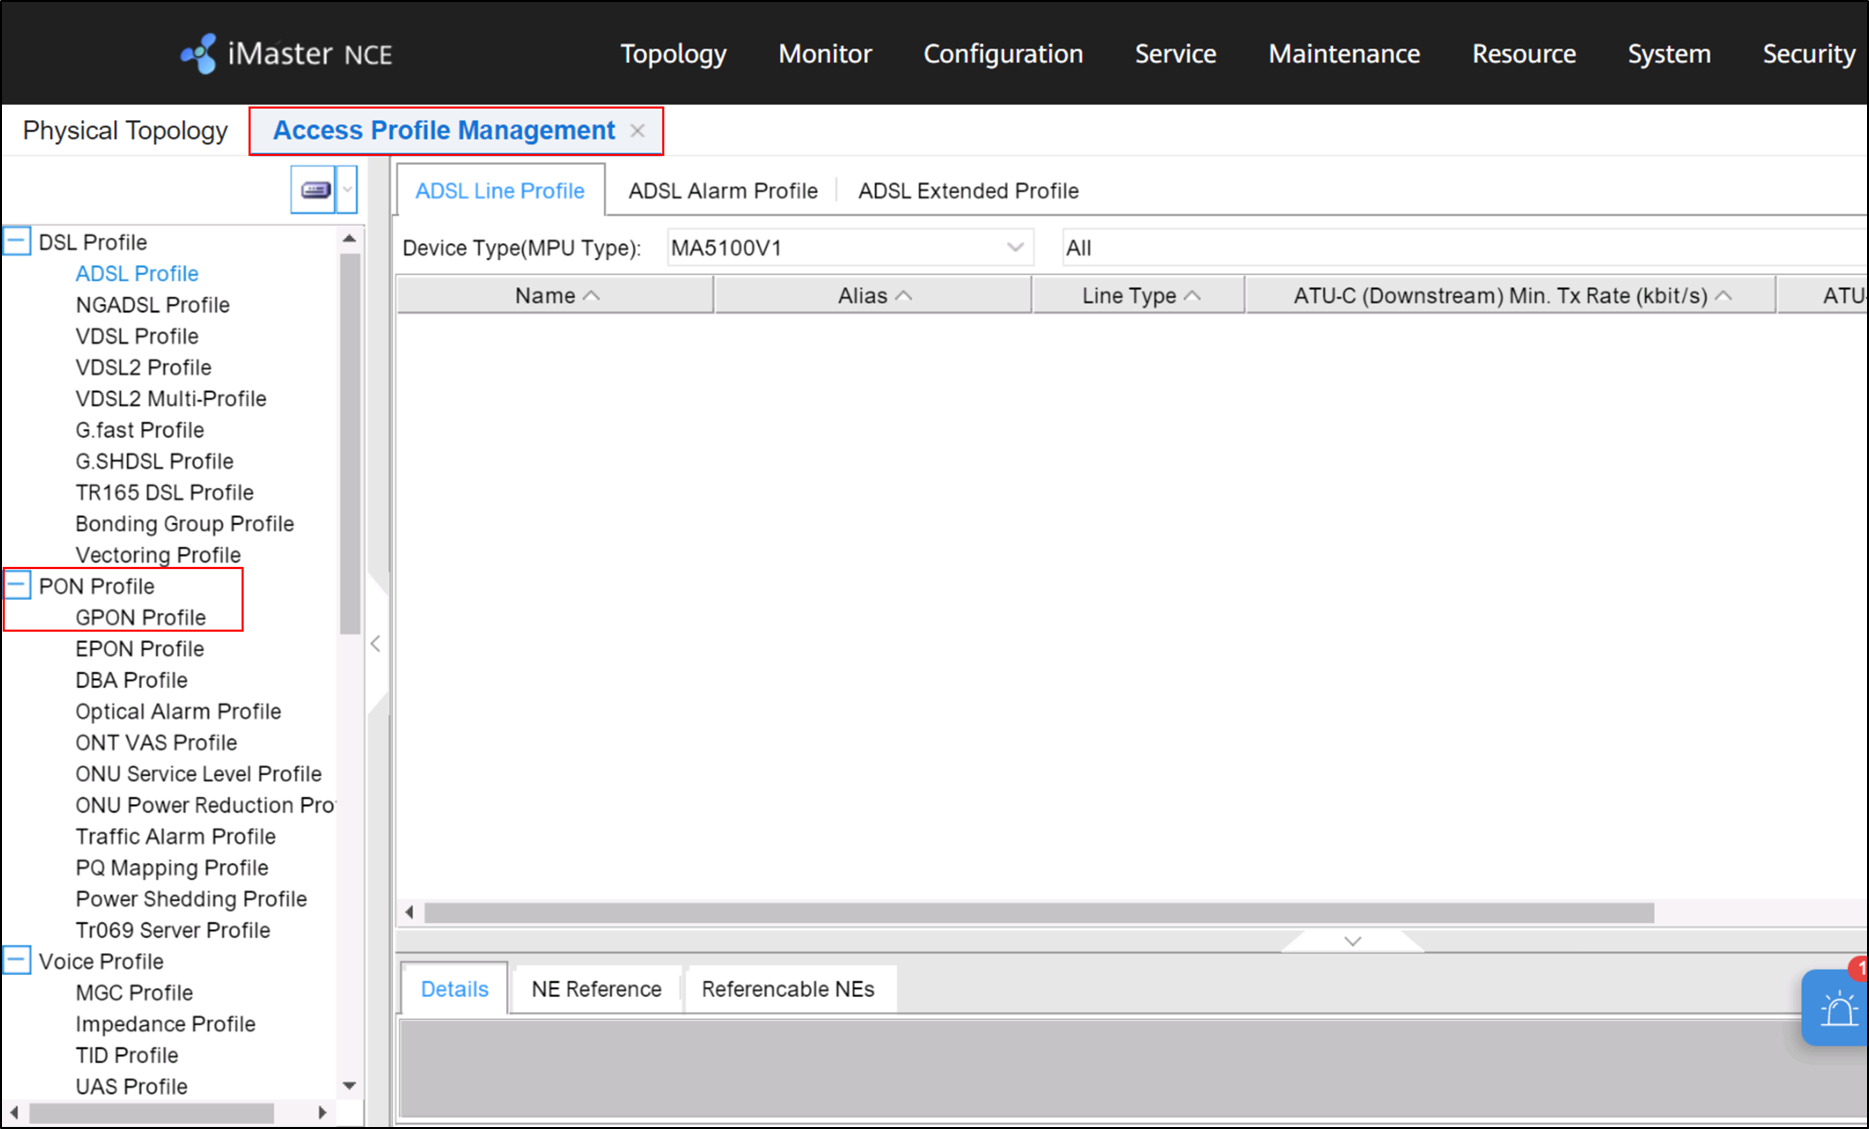
3. On the Access Profile Management tab page, choose PON Profile > GPON Profile.
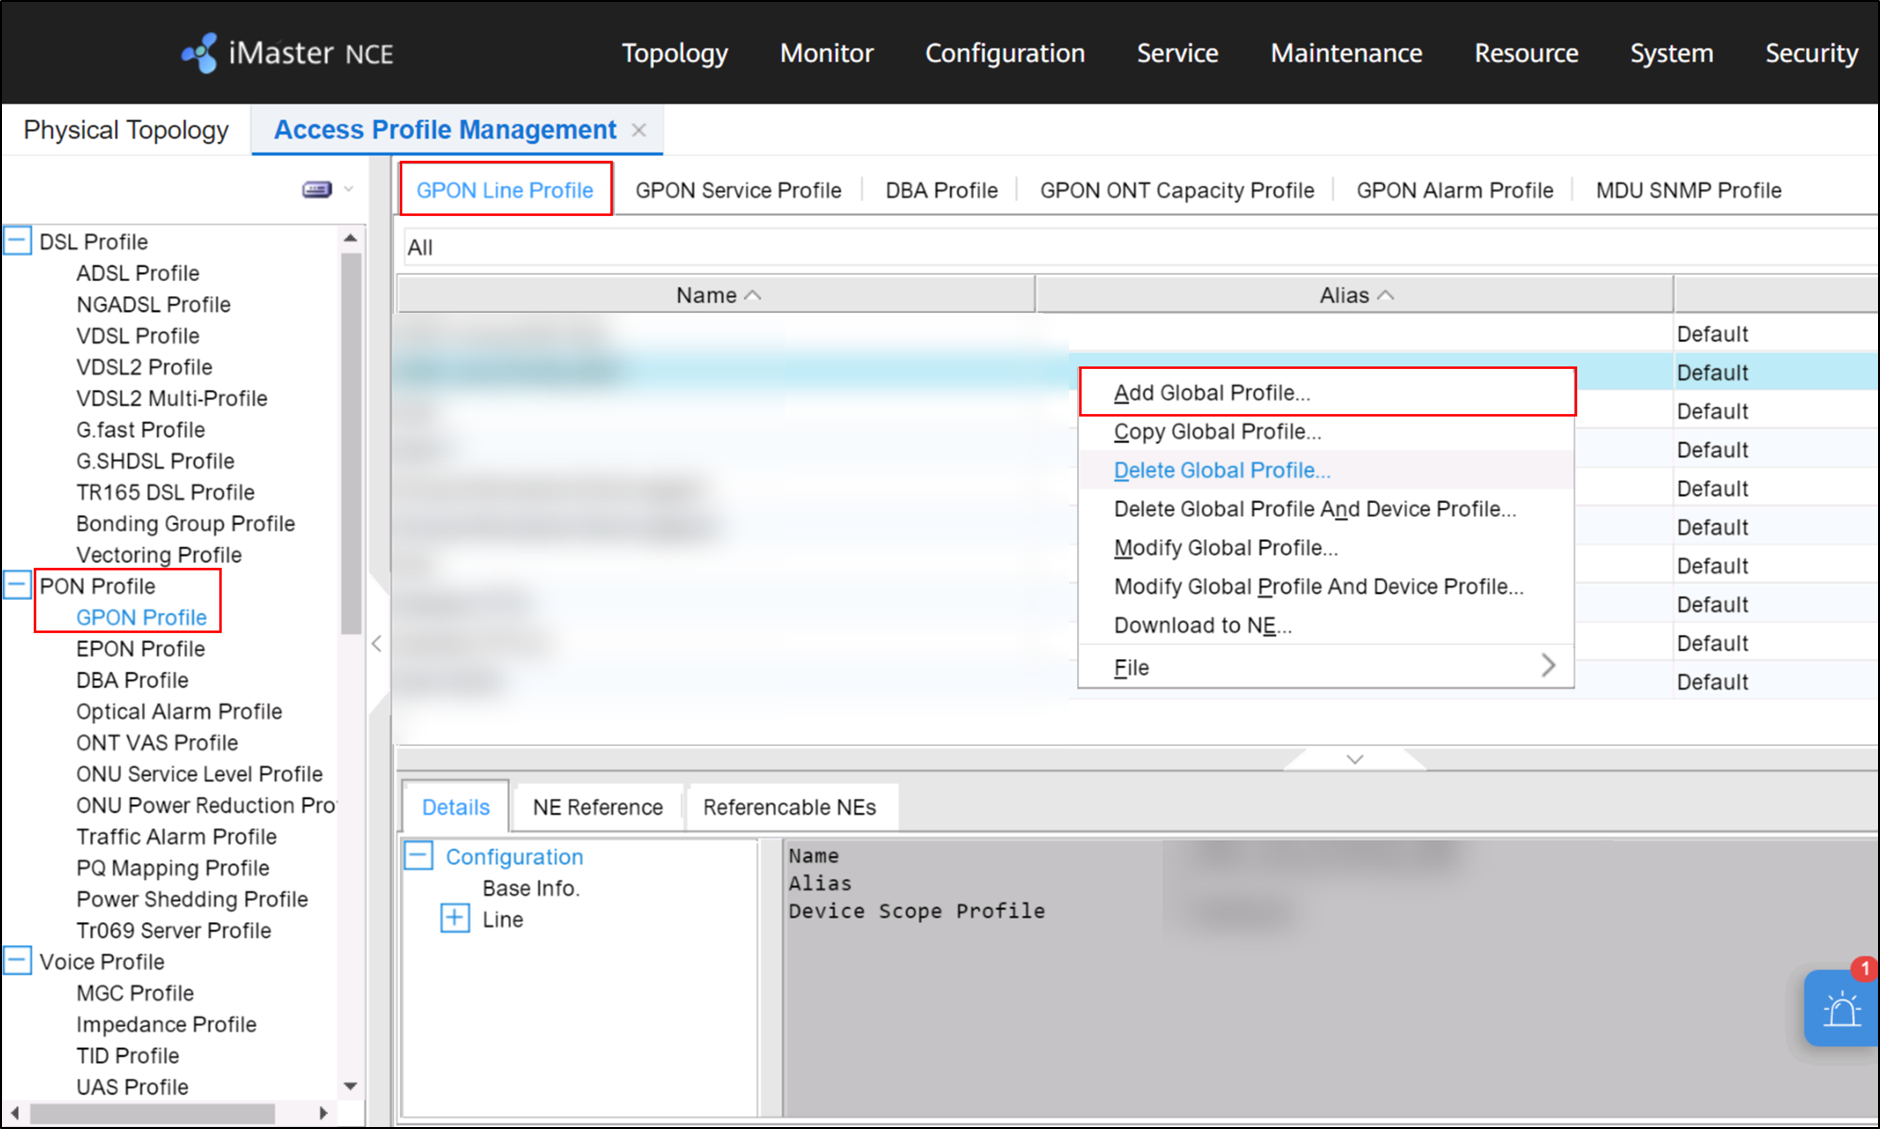
4. Choose GPON Line Profile and Right-click Add Global Profile from the shortcut menu.
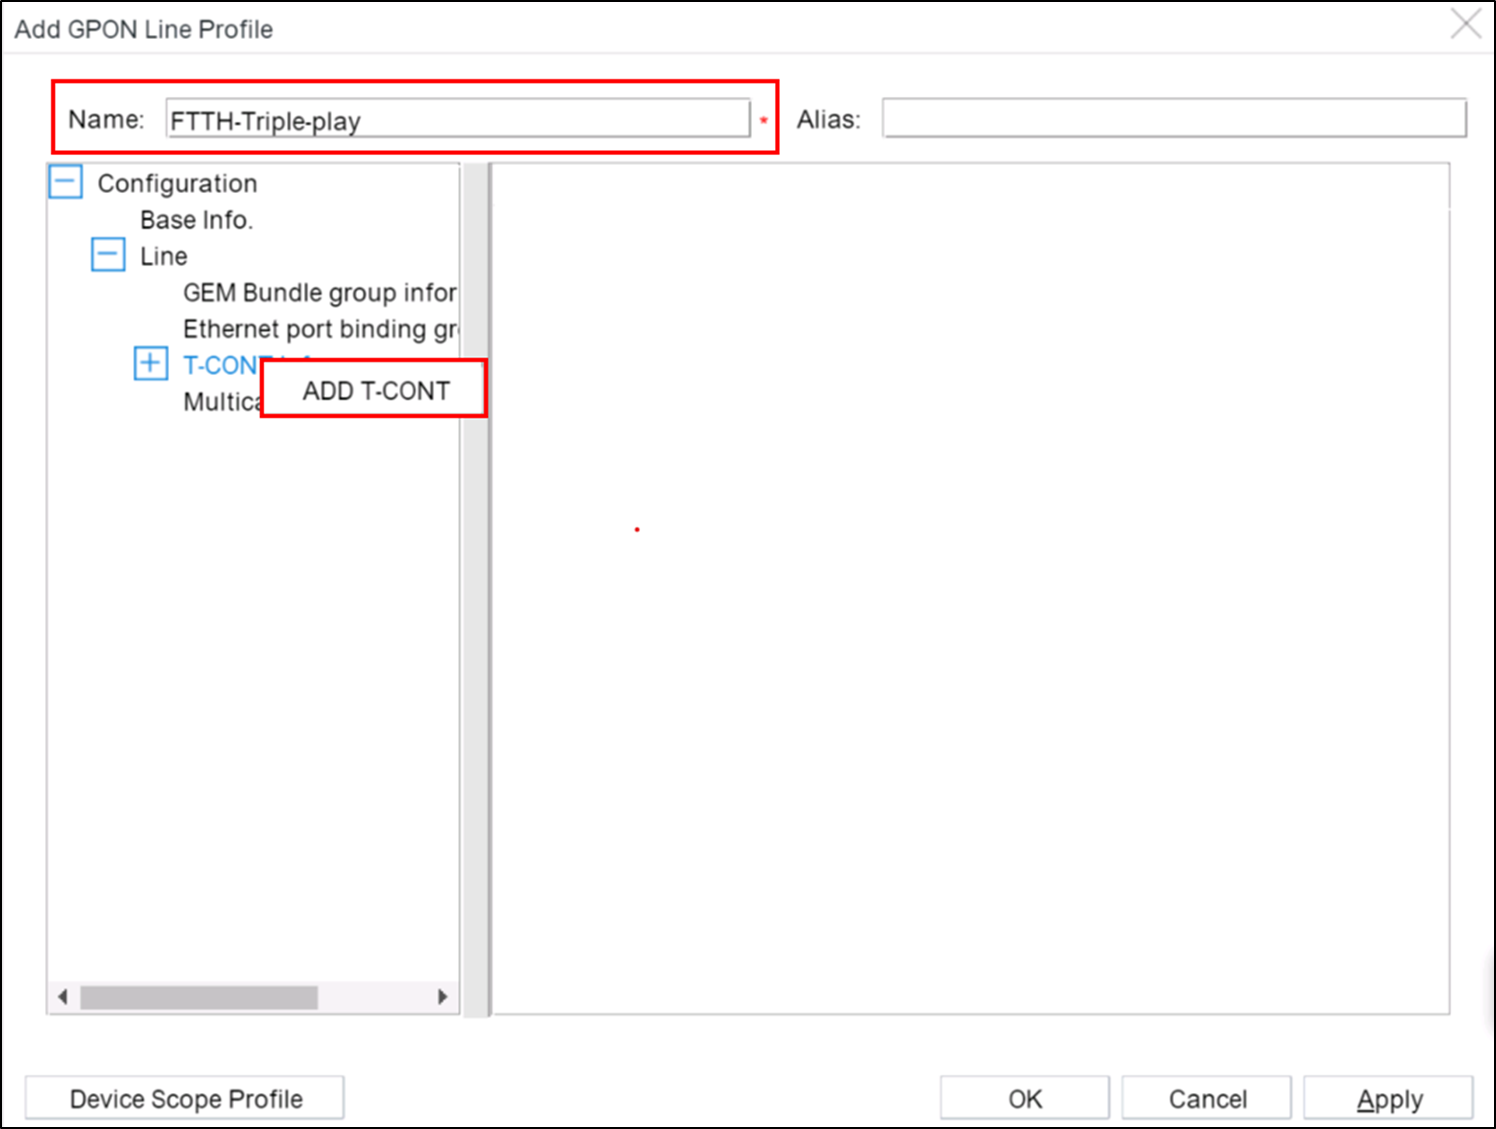
5. In the Add GPON Line Profile dialog box, enter Name, right-click T-CONT, and click ADD T-CONT.
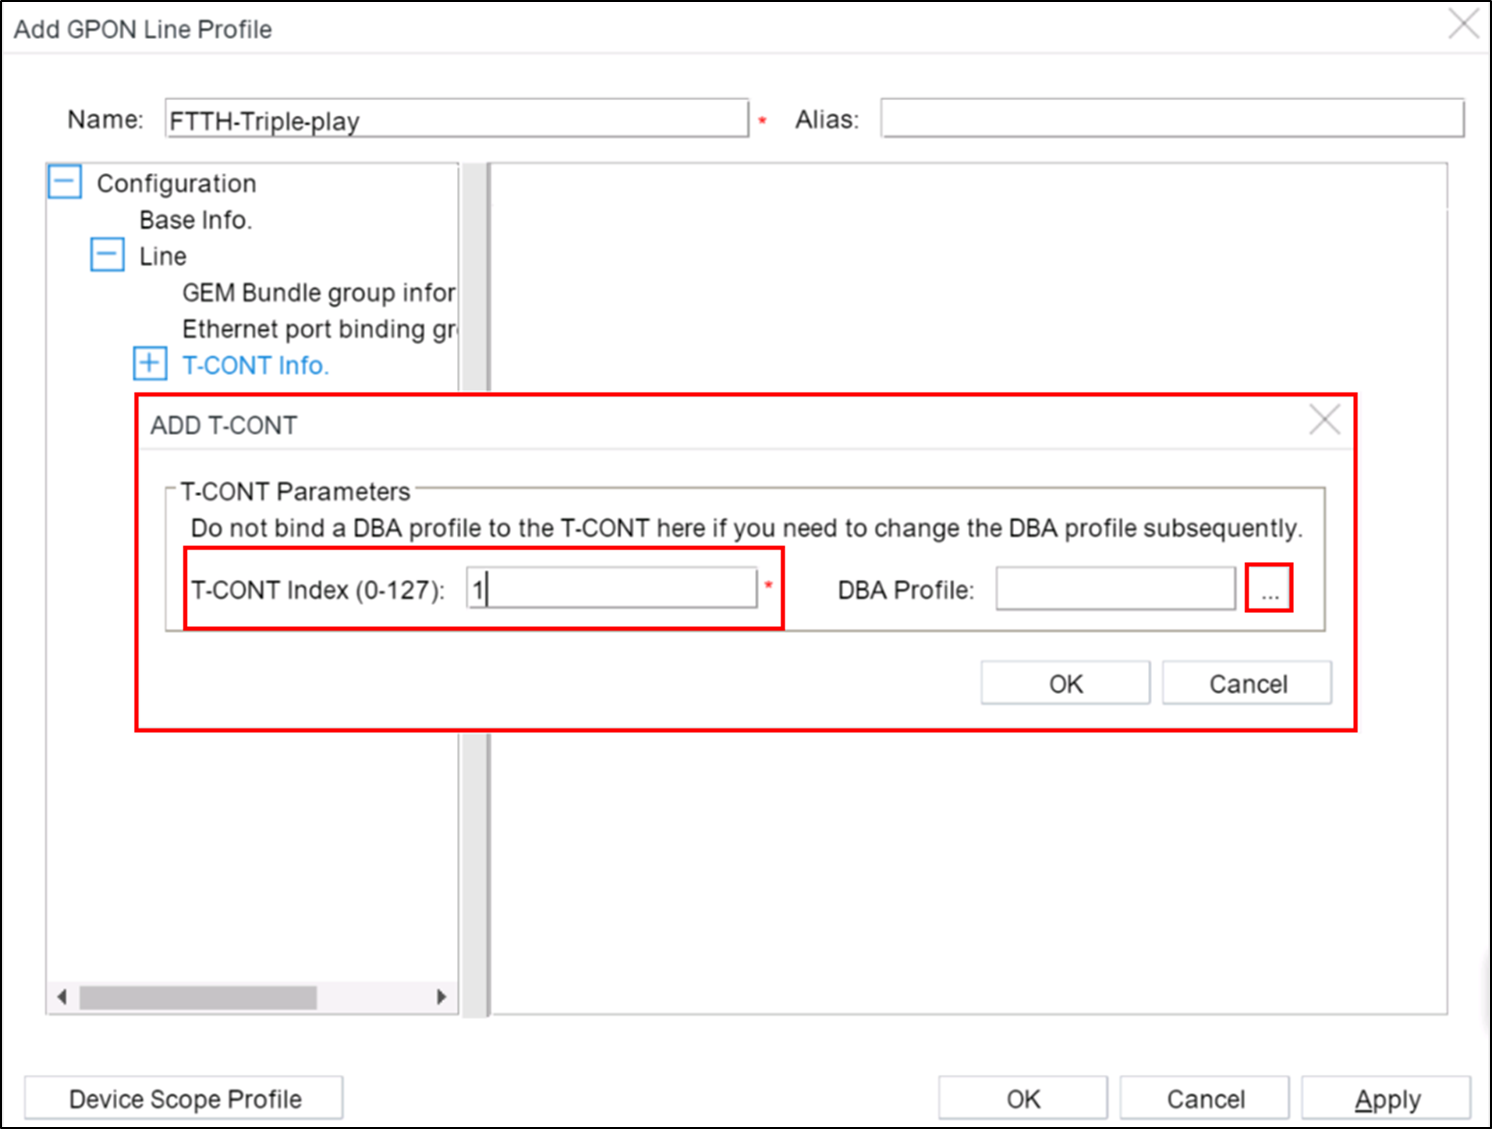
6. In the Add T-CONT dialog box, enter the T-CONT index and click ….
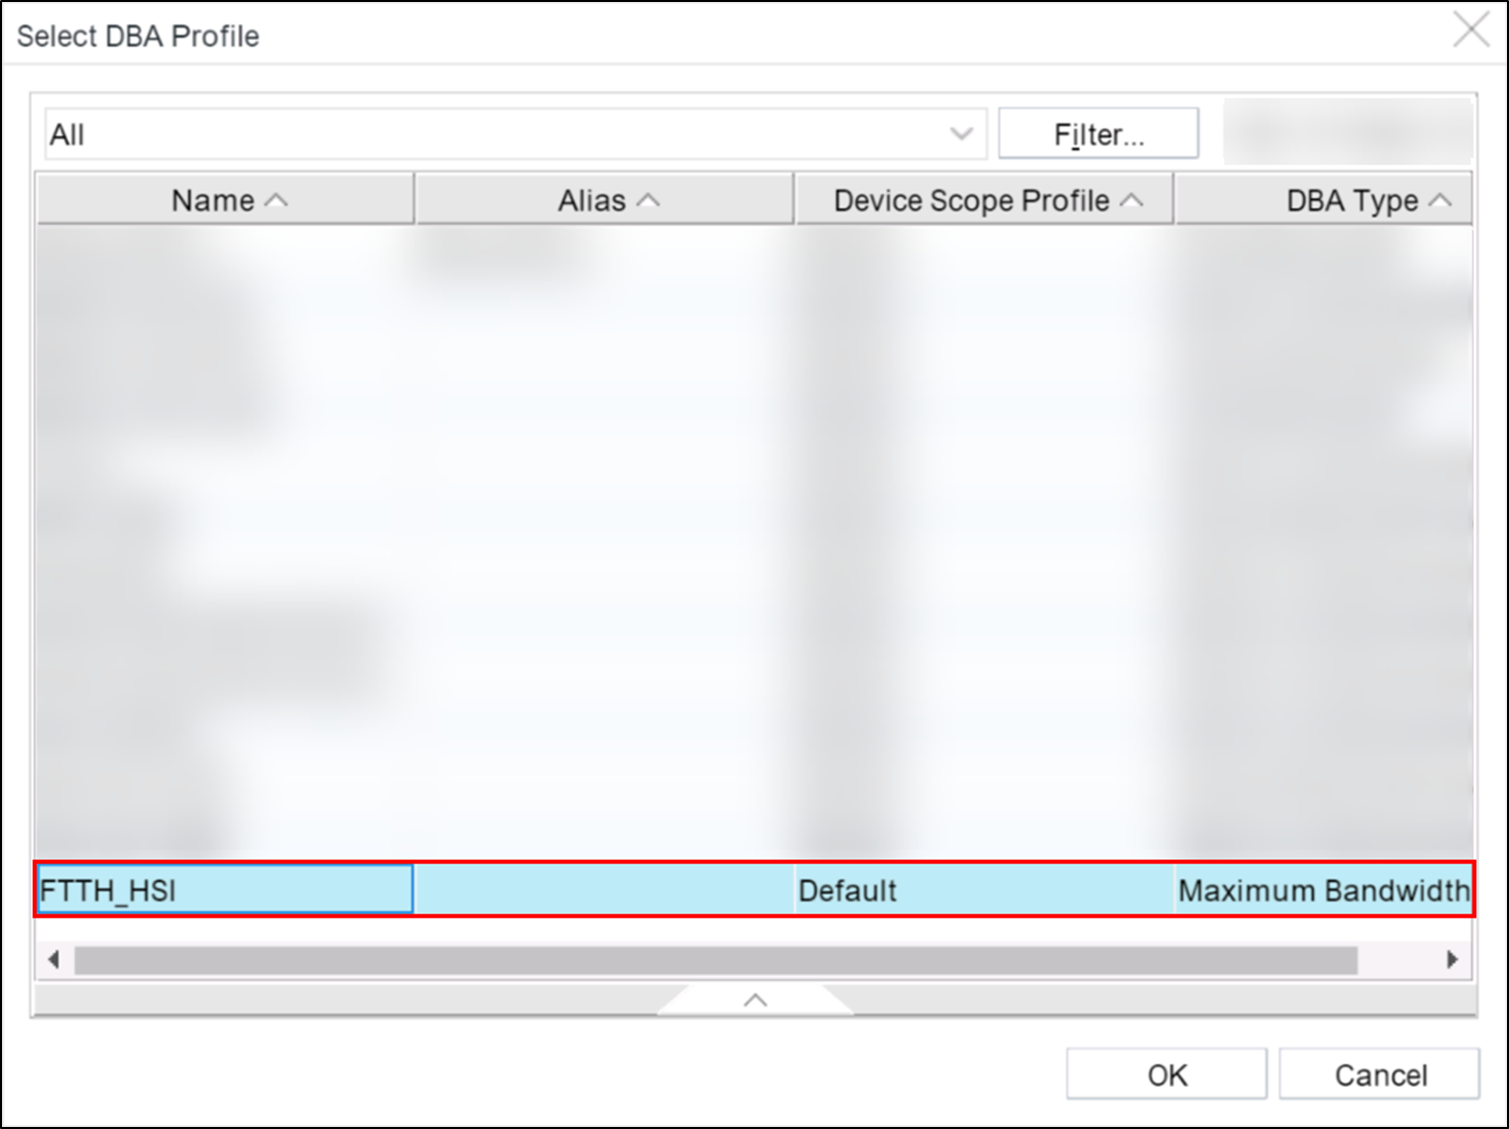
6. Select the DBA profile to be bound, then click OK.
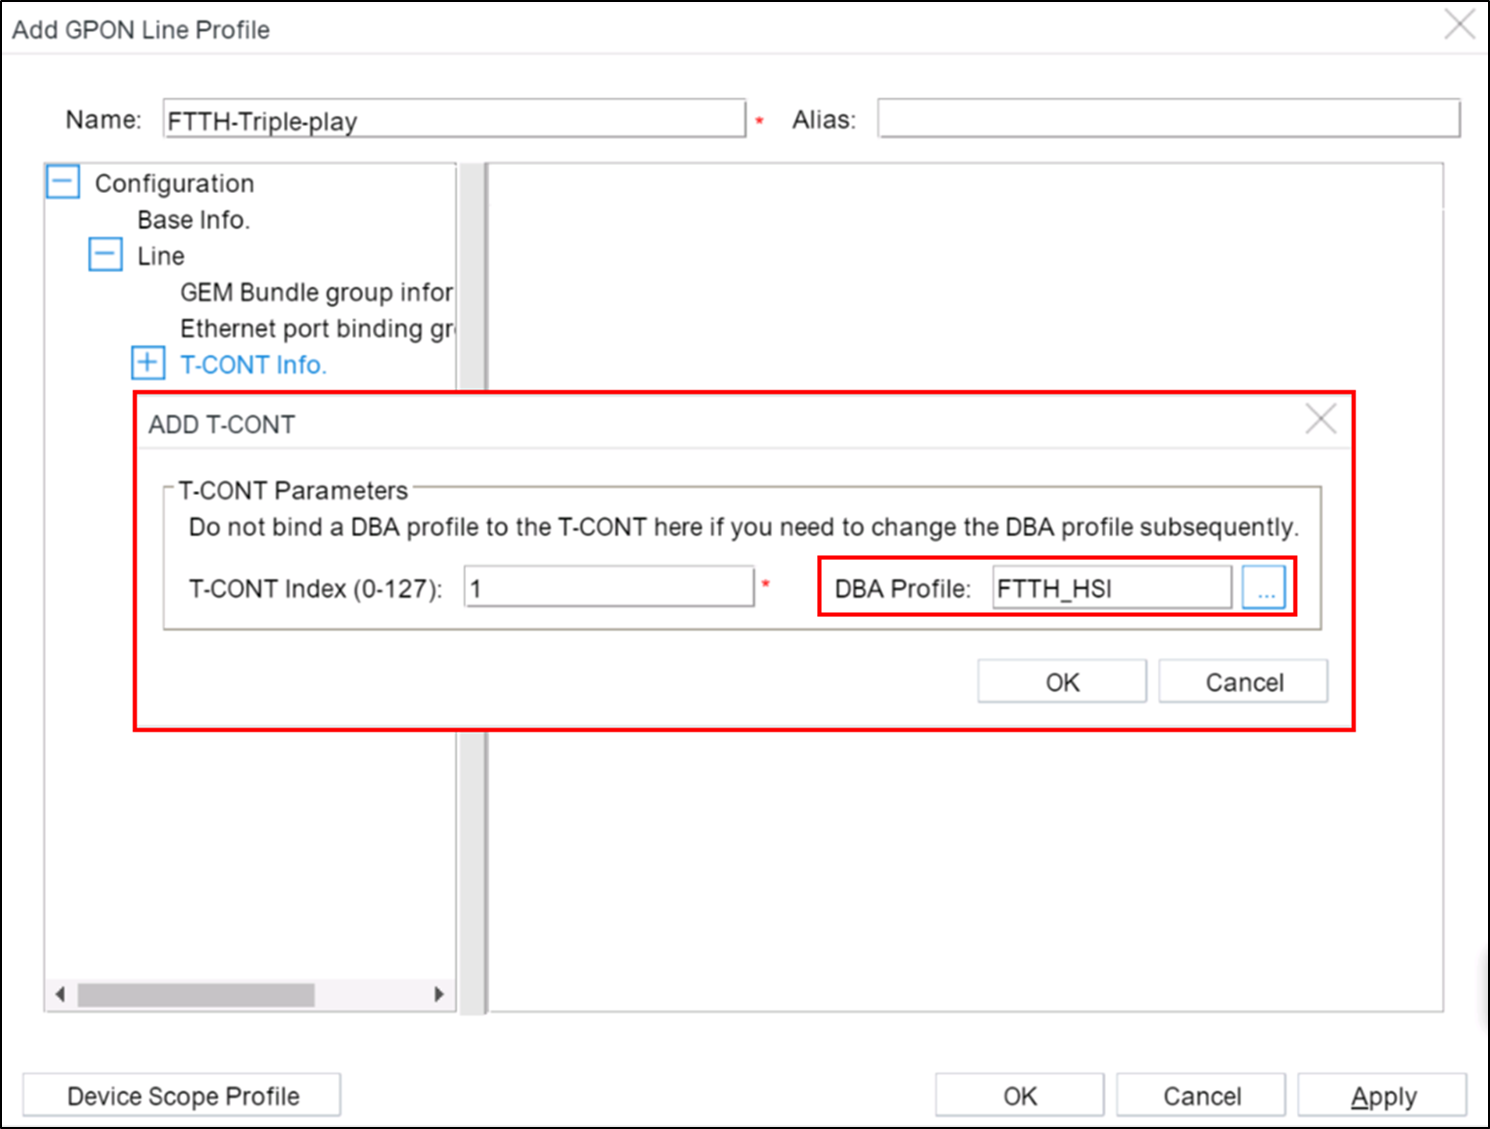
7. Click OK.
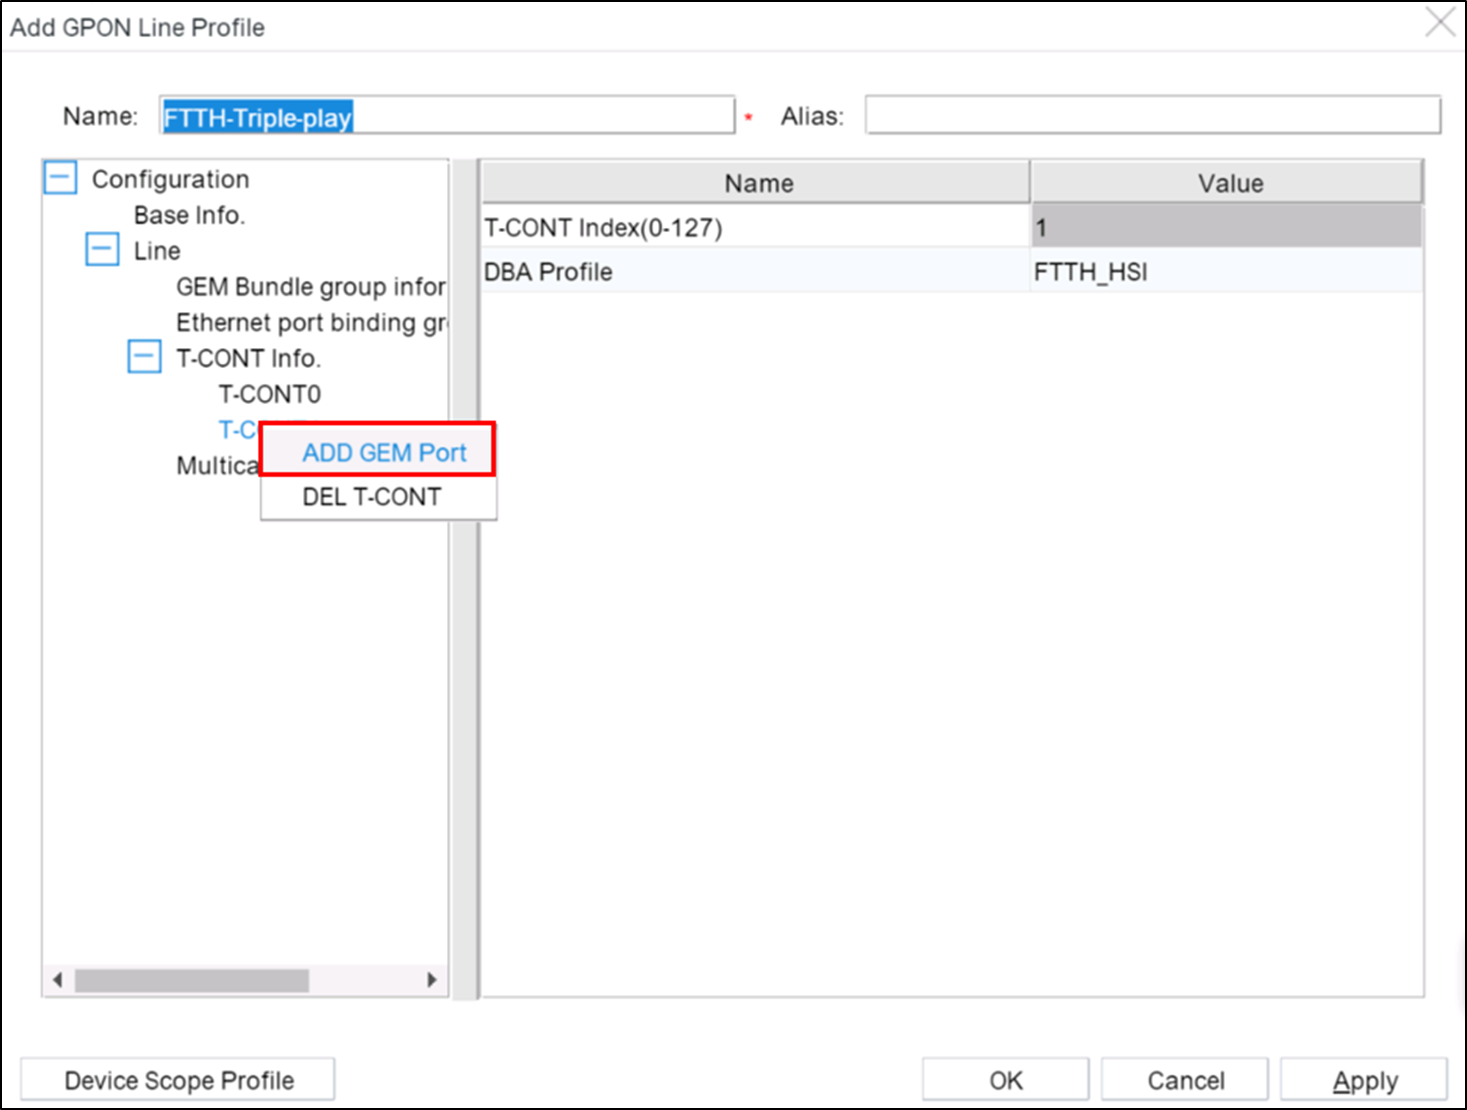
8. Right-click T-CONT1 and click ADD GEM Port from the shortcut menu.
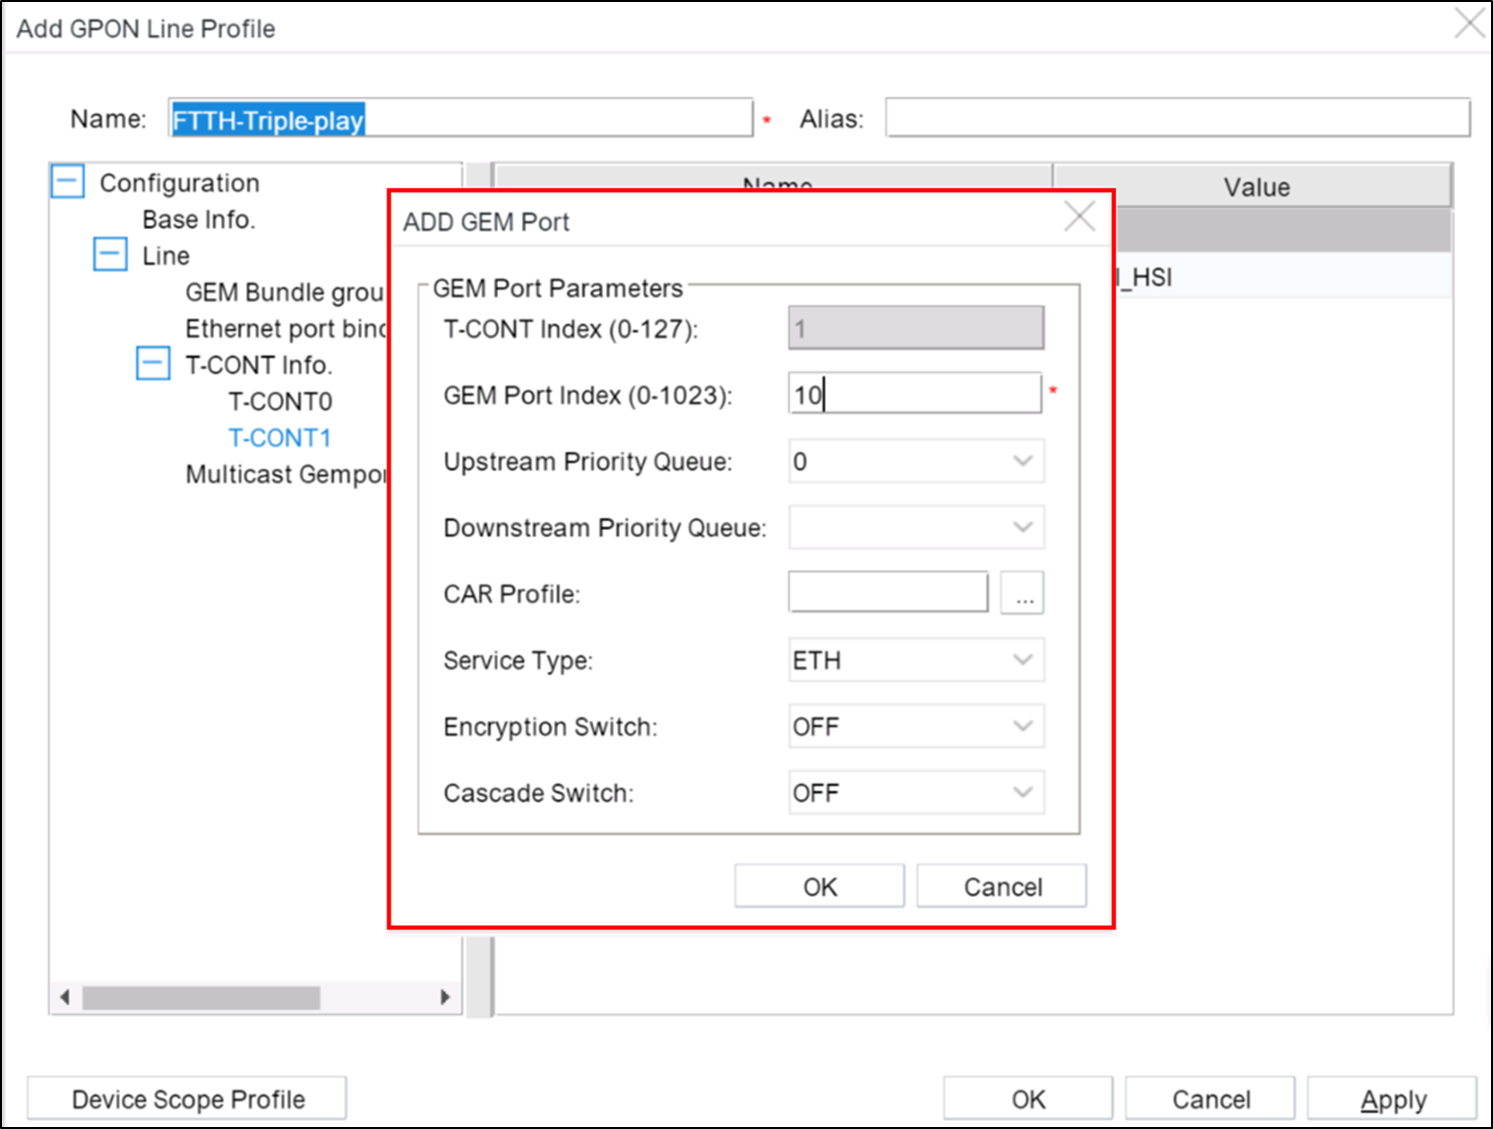
9. In the ADD GEM Port dialog box, set the parameters of the GEM Port.
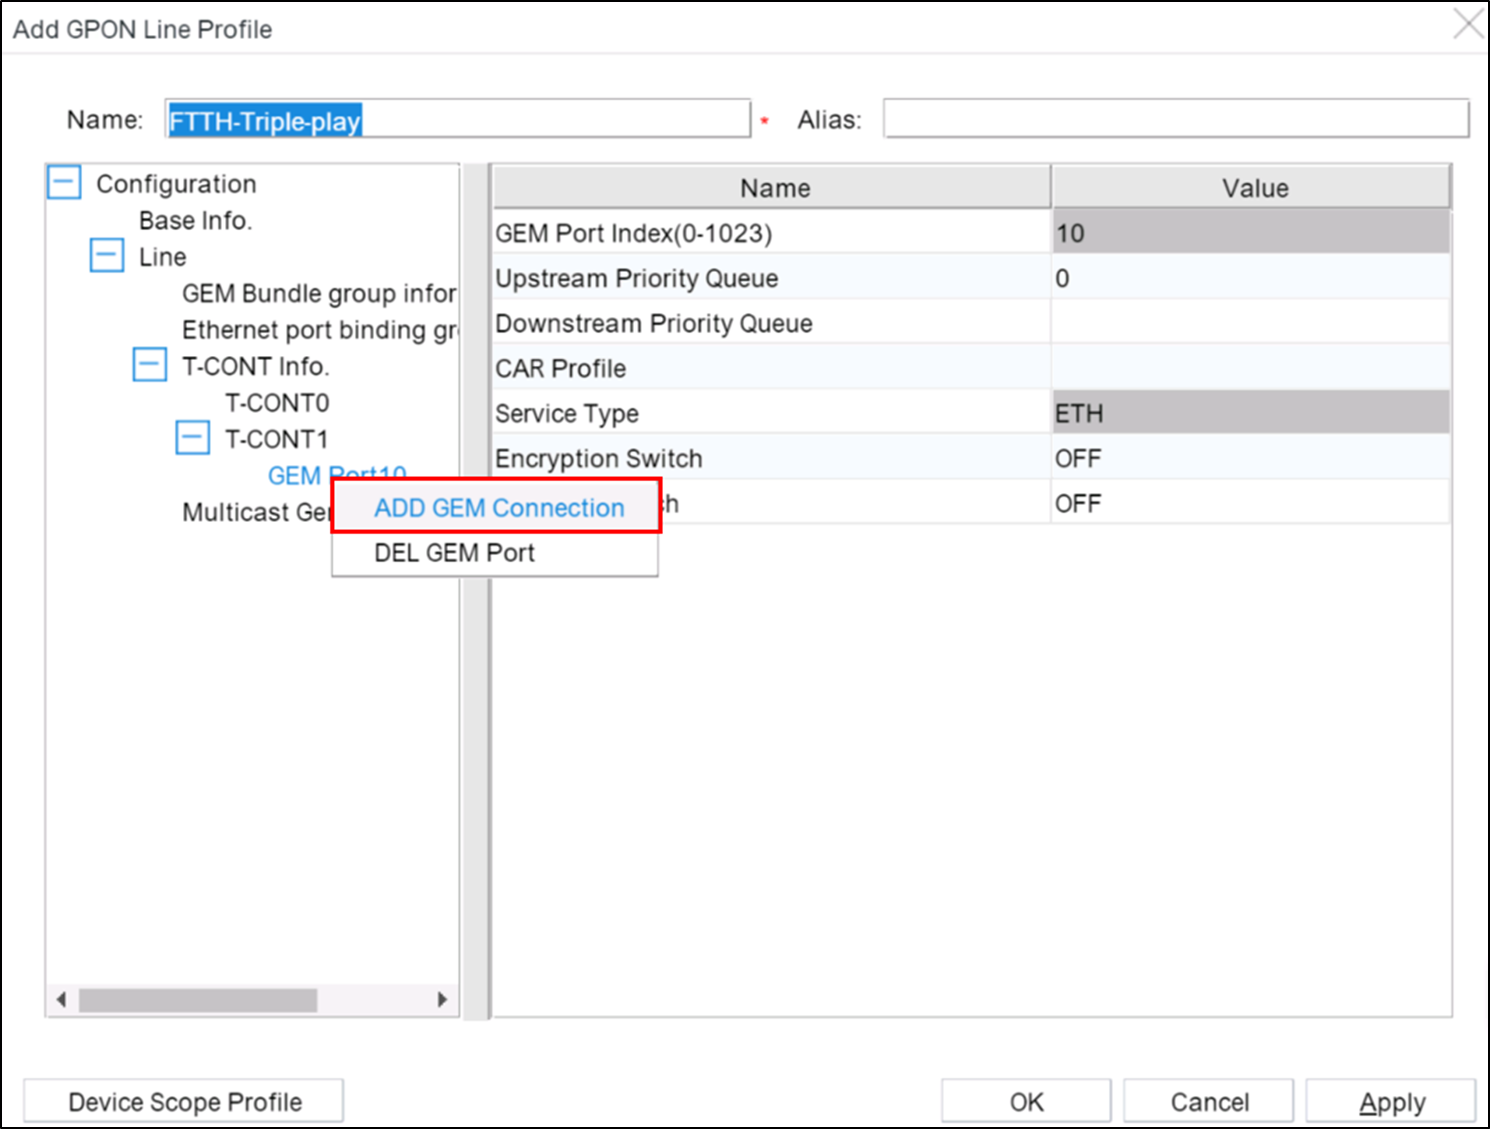
10. Right-click GEM Port0 and click ADD GEM Connection from the shortcut menu.
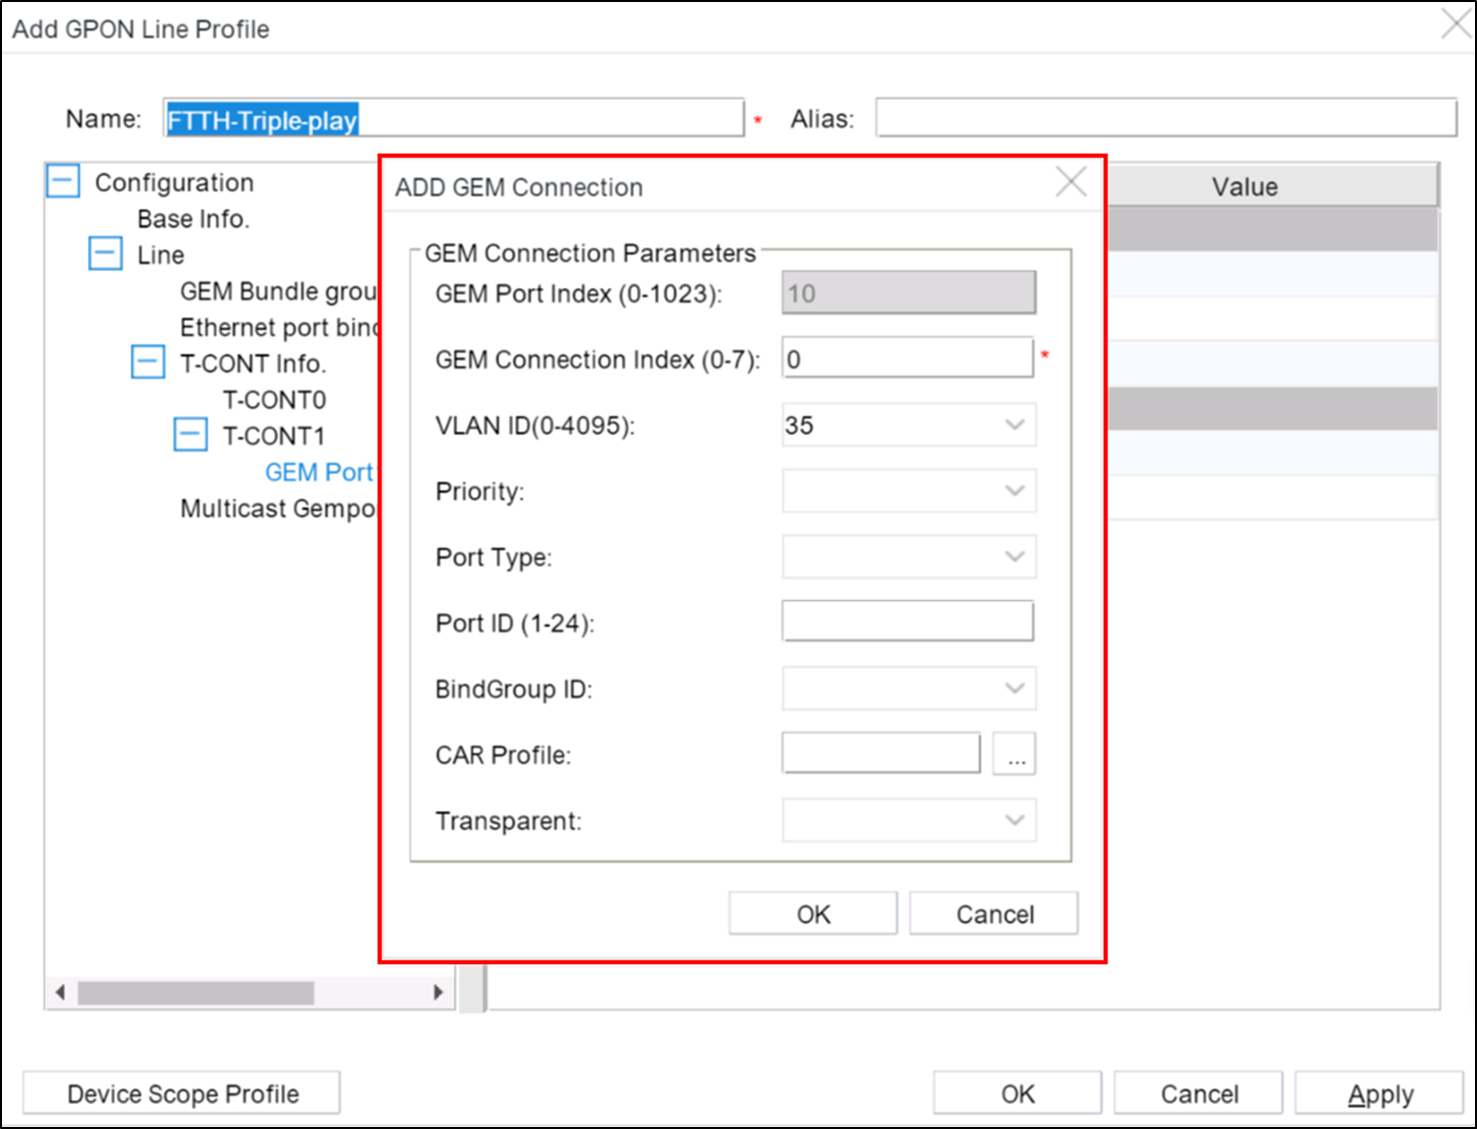
11. In the ADD GEM Connection dialog box, set the parameters of the VLAN, then click OK.
12. Right-click the created GPON Line Profile and click Download to NE.

13. In the Delivering GPON Line Profile dialog box, bind the device to be applied, and then click OK.
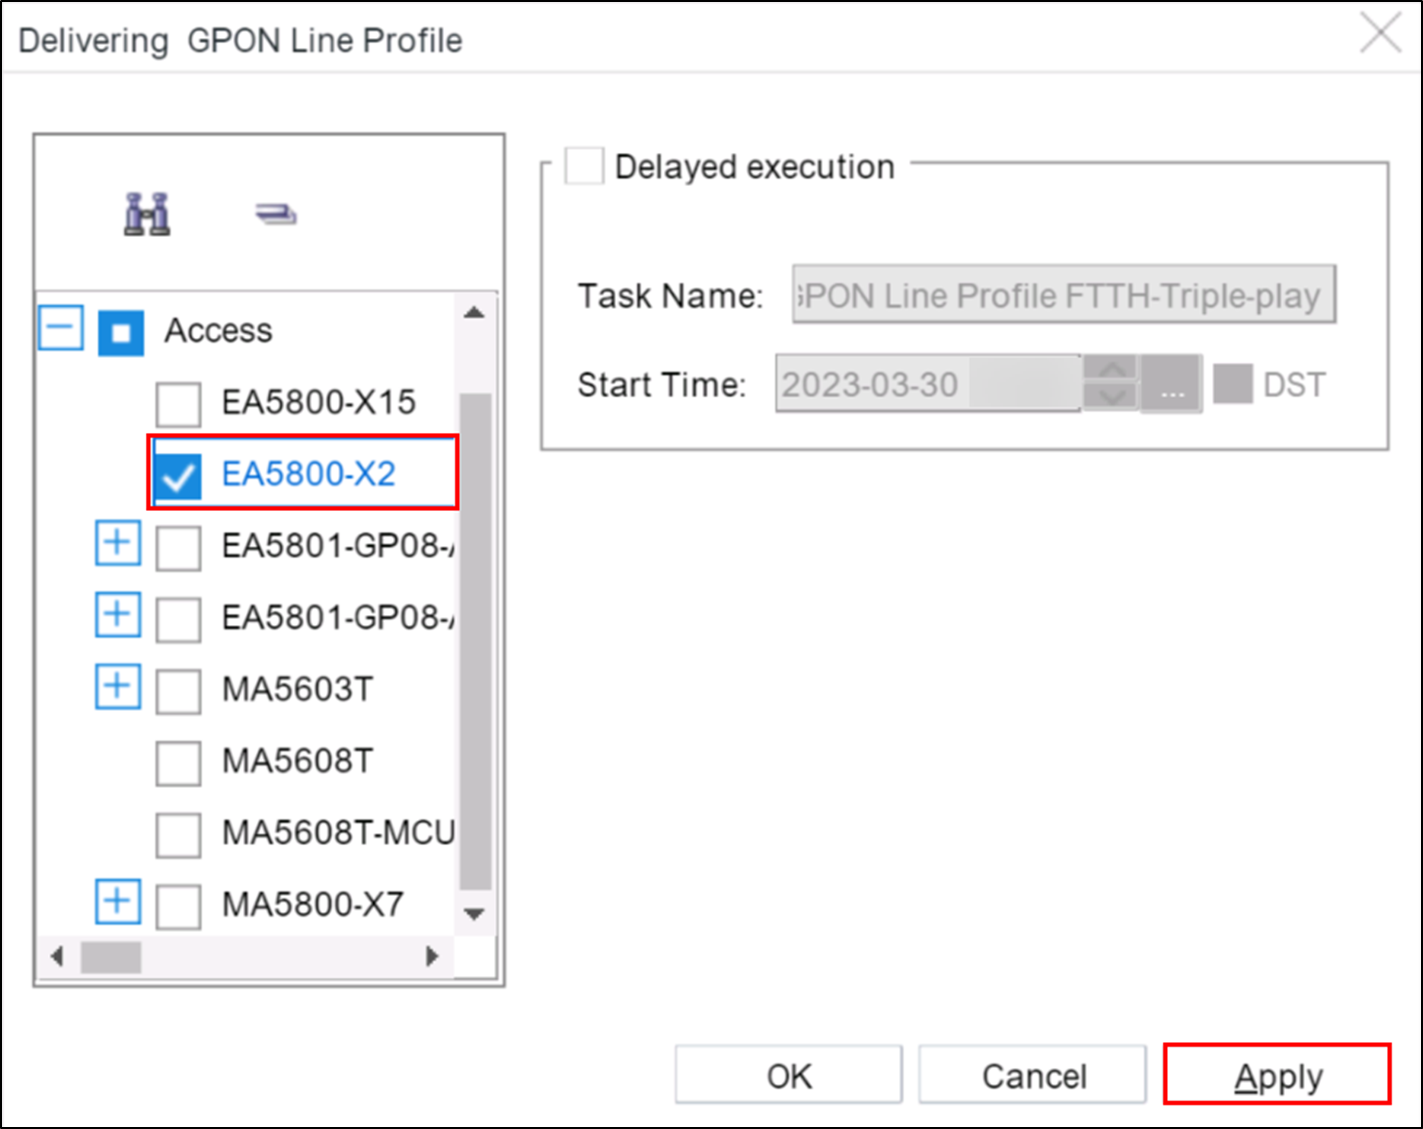
14. In the Task Progress dialog box, the result is displayed.
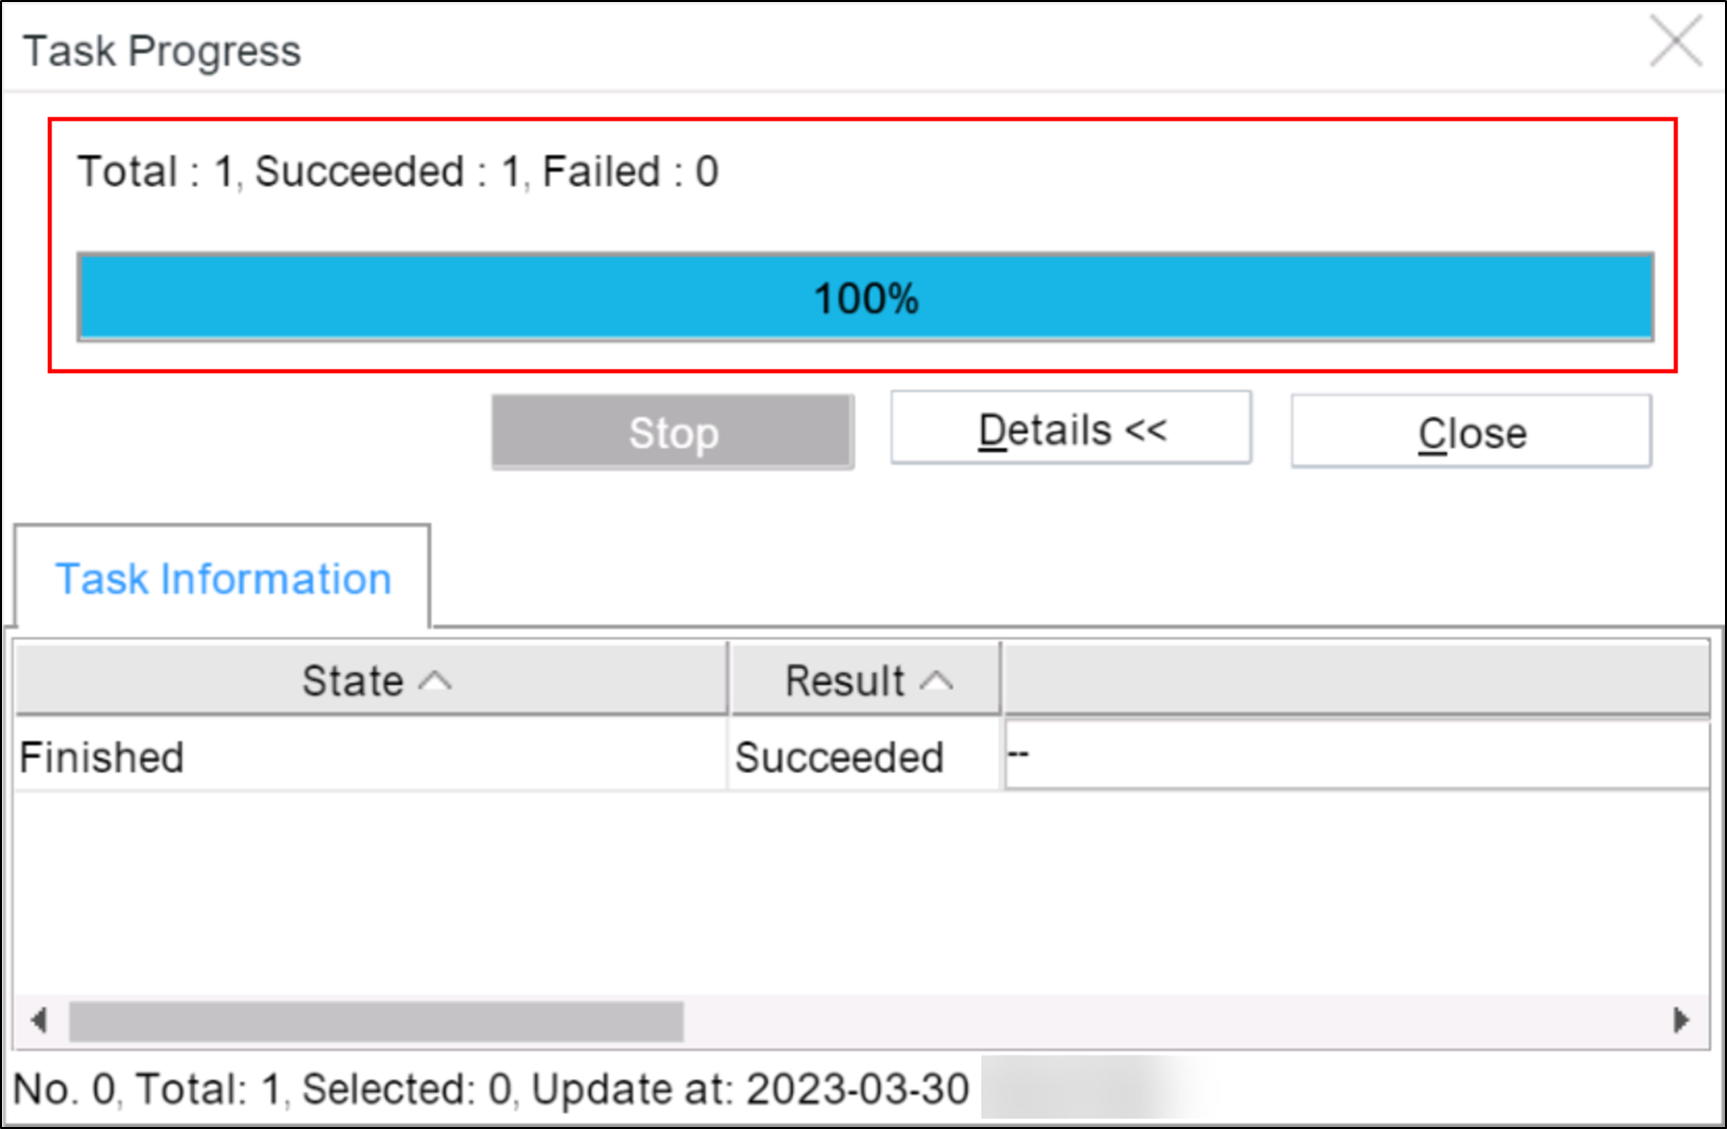
GPON Line Profile has been configured, now you can configure ONT by use that profile.
You can check below link for Service Profile configure.
How to Create Service Profile by iMaster NCE-FAN NMS.
GPON Profile configure example in YouTube.

