PHYHOME OLT Configuration FH-Net FHL1012B/016B/040B
[boxads]
Hi everybody ! Today i will show you how to PHYHOME OLT Configuration in FH-Net FHL1012B/016B/040B series OLT.
Two way we can configure this OLT, one is CLI mode another is NMS GUI mode. Today i will show you PHYHOME OLT Configuration in cli mode.
Step 1.Log in
You may login to the FHL1012B by serial port or by Ethernet cable. We suggest use secureCRT tool to manage, this tool support serial management and Telnet management
1.1.Login to the OLT by the serial port
Connect the serial cable the the console port, setup the Baud rate to 9600,and open the console port, Access the OLT by the username/passowrd:admin/admin. The passowrd of enable mode is “admin” also.

1.2. Log in by Telnet
The default IP address of the FHL1012B is 192.168.100.2.
Connect the Ethernet cable to the NMS port, configure the static IP of your PC to 192.168.100.100,and then start a PING test to see if the 192.168.100.2 is reachable.
Set up a telnet session to 192.168.100.2 and input the username “admin”, password “admin” to access the OLT.
Step 2 Enable the PON port and uplink port.
Before provisioning the services, please make sure the PON port and uplink port is active
2.1. Enable the uplink port
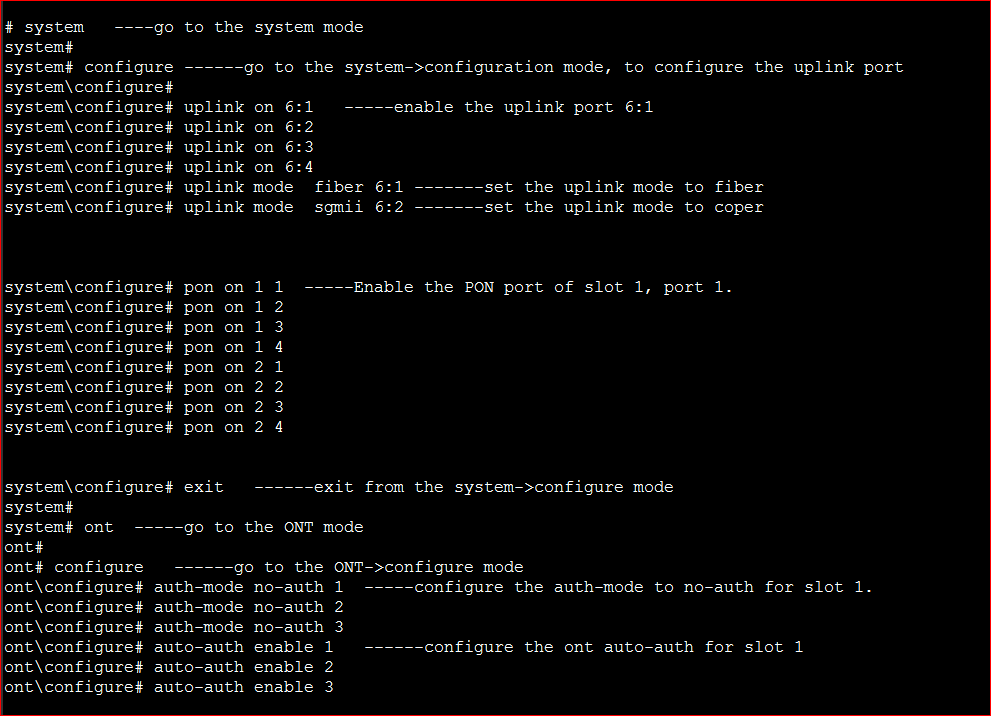
# system —-go to the system mode
system#
system# configure ——go to the system->configuration mode, to configure the uplink port
system\configure#
system\configure# uplink on 6:1 —–enable the uplink port 6:1
system\configure# uplink on 6:2
system\configure# uplink on 6:3
system\configure# uplink on 6:4
system\configure# uplink mode fiber 6:1 ——-set the uplink mode to fiber
system\configure# uplink mode sgmii 6:2 ——-set the uplink mode to coper
2.2 Enable the PON port.
system\configure# pon on 1 1 —–Enable the PON port of slot 1, port 1.
system\configure# pon on 1 2
system\configure# pon on 1 3
system\configure# pon on 1 4
system\configure# pon on 2 1
system\configure# pon on 2 2
system\configure# pon on 2 3
system\configure# pon on 2 4
Step 3, configure the ONT auth mode to auto-auth
Here you may configure the ONT auth mode to auto-auth, so that the ONT will be register to the OLT automatically.
system\configure# exit ——exit from the system->configure mode
system#
system# ont —–go to the ONT mode
ont#
ont# configure ——go to the ONT->configure mode
ont\configure# auth-mode no-auth 1 —–configure the auth-mode to no-auth for slot 1.
ont\configure# auth-mode no-auth 2
ont\configure# auth-mode no-auth 3
ont\configure# auto-auth enable 1 ——configure the ont auto-auth for slot 1
ont\configure# auto-auth enable 2
ont\configure# auto-auth enable 3
step 4, connect the ONT to the OLT
Connect the ONT to the OLT and please make sure the RX optical power at the ONT side is between -3dbm and -27dbm
After that you would see the ONT has registered to the OLT automatically:
ont\configure#exit
ont# display ont-auth-info slotno 1
onu-idx onu-type mac-addr encryption refreshtime catv
1/4/2 B03_304_AN_ANN 00:aa:bb:01:23:45 disabled N\A x
step 5, Configure the internet services for the ONT
ont# service ———go to the service mode, in this mode you may query the services
service# configure ——-go to the service->configure mode
service\configure# service number 1 2 3 4 5 —–configure the services number of the ONT slot 1, pon port 2, onuID 3, eth port 4. the services number of this eth port is 5. you need to modify the parameters according to the real location&type of your ONT.
service\configure# customer-vlan 1 2 3 4 1 tag 5 33204 6 ——configure the services for the ONT located slot 1, pon port 2, ONTID 3, here we configure the ONT ethernet port 4, the index the services is 1, the vlan mode is tag, and 802.1Q priority is 5, vlan ID is 6, and 802.1Q type is 0x8100(33204 in decimal scale)
Apply services to the ONU:
service\configure# apply fe-service-compress-pkt 1 2 3
[bodyads]
step 6, Configure the VLAN and join to the uplink port
service\configure#
service\configure# exit
service# vlan ——go to the vlan mode.
vlan#
vlan# vlan-database data internet 6 6:1 tagged —– create a vlan 6, named internet, and join to the uplink port 6:1, the packets will be tagged by vlan 6 when left from this uplink port.
Here the internet services set up finish, you may test the internet services by the ping to see if everything is ok.


